Put the fixes into your course
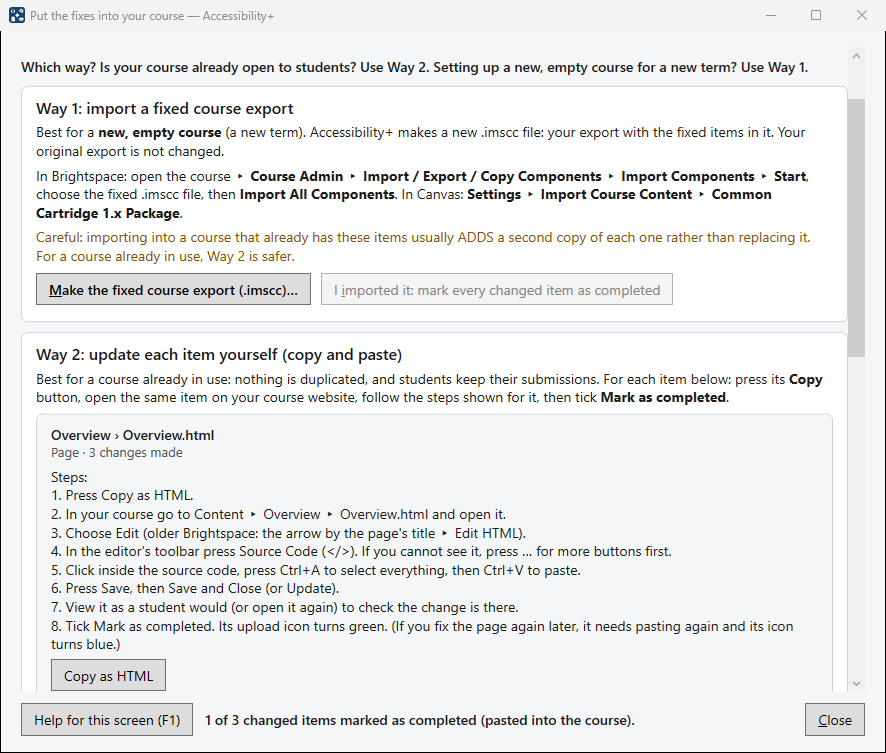
Accessibility+ never changes your course website. Put the fixes in one page at a time from the main window (below), or in the editor press Put the fixes into your course… and choose one of two ways. Is your course already open to students? Use Way 2. Setting up a new, empty course for a new term? Use Way 1.
One page at a time, from the main window
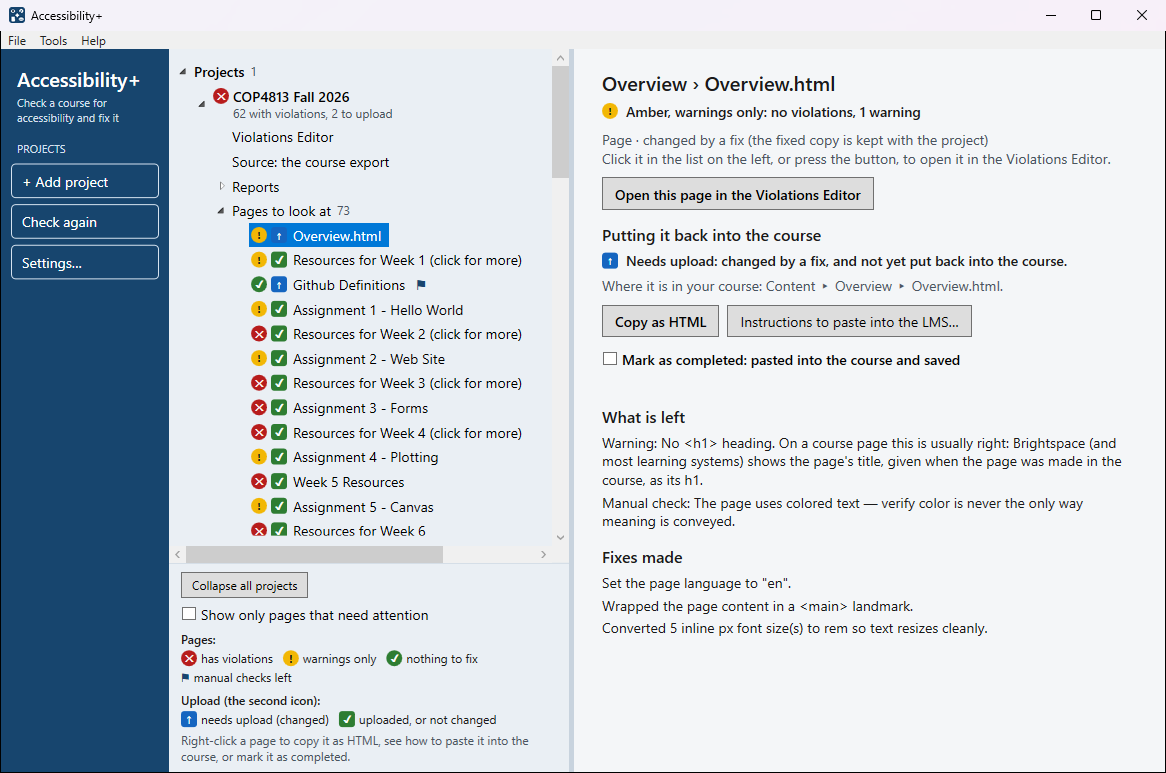
In the list of pages, a blue ↑ square beside a page means it was changed and is not in your course yet. Right-click the page (or choose it and use the buttons on the right, under Putting it back into the course):
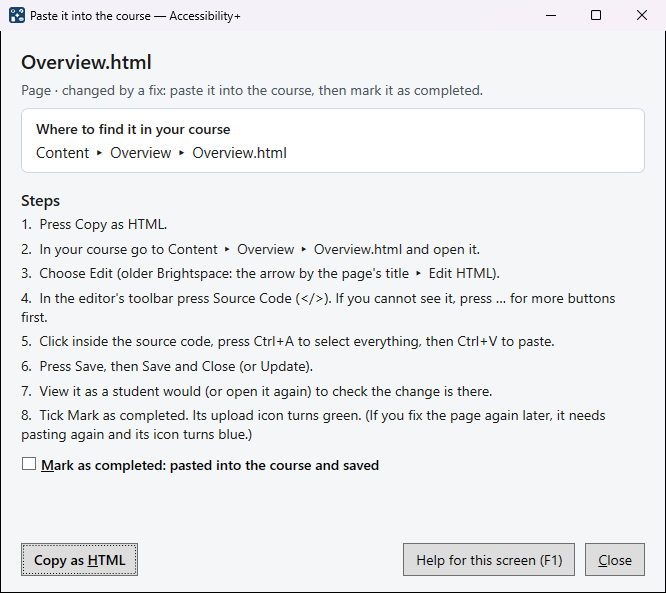
- Instructions to paste into the LMS… says where the page is in your course — for example Content ▸ Week 3 ▸ Reading list, or Assignments ▸ Lab 3 — and the steps. They are the same for every page; only where to find it changes.
- Copy as HTML puts the fixed page on the clipboard (for an assignment, its instructions; for a discussion, its description). In your course open it, choose Edit, press Source Code (</>), press Ctrl+A, then Ctrl+V, and save.
- Mark as completed once it is pasted and saved: the square turns green. Not completed yet undoes the mark.
Way 1: import a fixed course export
Press Make the fixed course export (.imscc)…. Accessibility+ makes a new file: your export with the fixed items in it.
In Brightspace: open the course ▸ Course Admin ▸ Import / Export / Copy Components ▸ Import Components ▸ Start, choose the fixed file, then Import All Components. In Canvas: Settings ▸ Import Course Content ▸ Common Cartridge 1.x Package.
Careful: importing into a course that already has these items usually adds a second copy of each rather than replacing it.
Way 2: copy and paste each item
Each changed item is listed with a Copy button and the steps for its kind. For a page in Brightspace: open it in Content, choose Edit, press Source Code (</>; if you cannot see it, press … for more buttons first), select everything (Ctrl+A), paste (Ctrl+V), and save. Assignments (their instructions) and discussions (their description) are pasted the same way. Word and PowerPoint files are replaced with the fixed file.
Then view the item as a student would, and tick Mark as completed: pasted into the course and saved — the same mark as in the main window. The marks are kept with the project, so you can see what is left — and if you change an item again later, its mark clears (its square turns blue again), because the website then needs the new version.