
Each section below is the help that screen shows in Assessment+ itself, on its ℹ Help & Information tab (or F1), so it matches what you see on screen.
Accreditations
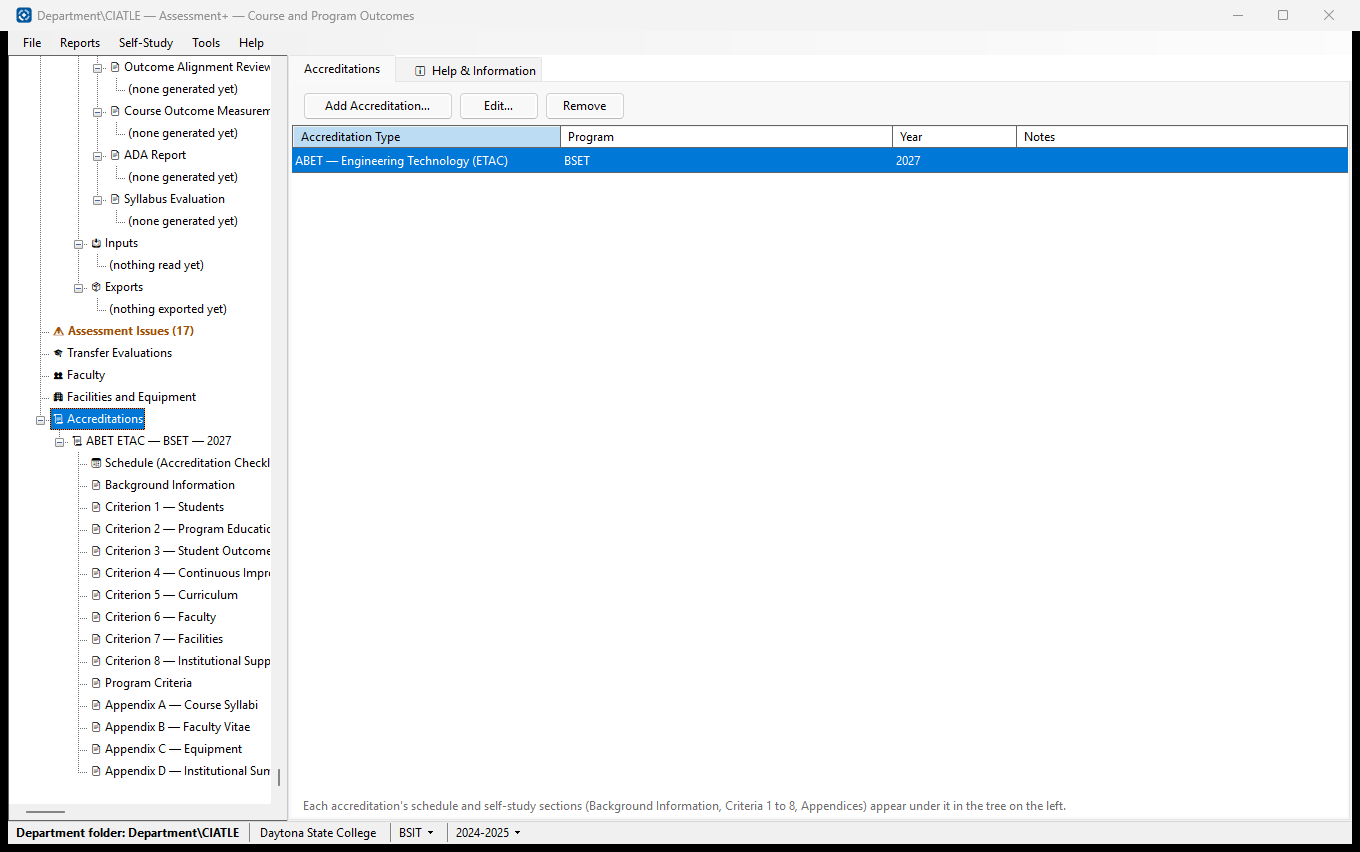
One record per accreditation effort — an accreditation type, a program and a year. Each is a workspace for writing that program's self-study.
How to use it
- Create the program first (Programs), then click Add Accreditation….
- Choose the accreditation type and the program, and type the year (e.g. 2026 or 2026-27).
- Expand the new accreditation in the tree: Schedule (Accreditation Checklist), then each self-study section from Background Information to Appendix D.
What it means, and what to watch for
- Each accreditation keeps its own checklist and its own section narratives.
- Remove takes the accreditation's checklist and its section narratives with it. A copy of the whole record is kept first in the department folder's backups\Removed accreditations folder. Program outcomes, courses and assessment data are not touched.
- ♻ Removed Accreditations… (shown once an accreditation has been removed) brings one back with its checklist and narratives. An accreditation whose program has been removed comes back only after the program does (Programs ▸ ♻ Removed Programs…).
See also
- Faculty, and Facilities and Equipment — the records Criteria 6 and 7 and Appendices B and C are built from.
- Institutional Information ▸ Institutional Summary — Appendix D.
One accreditation
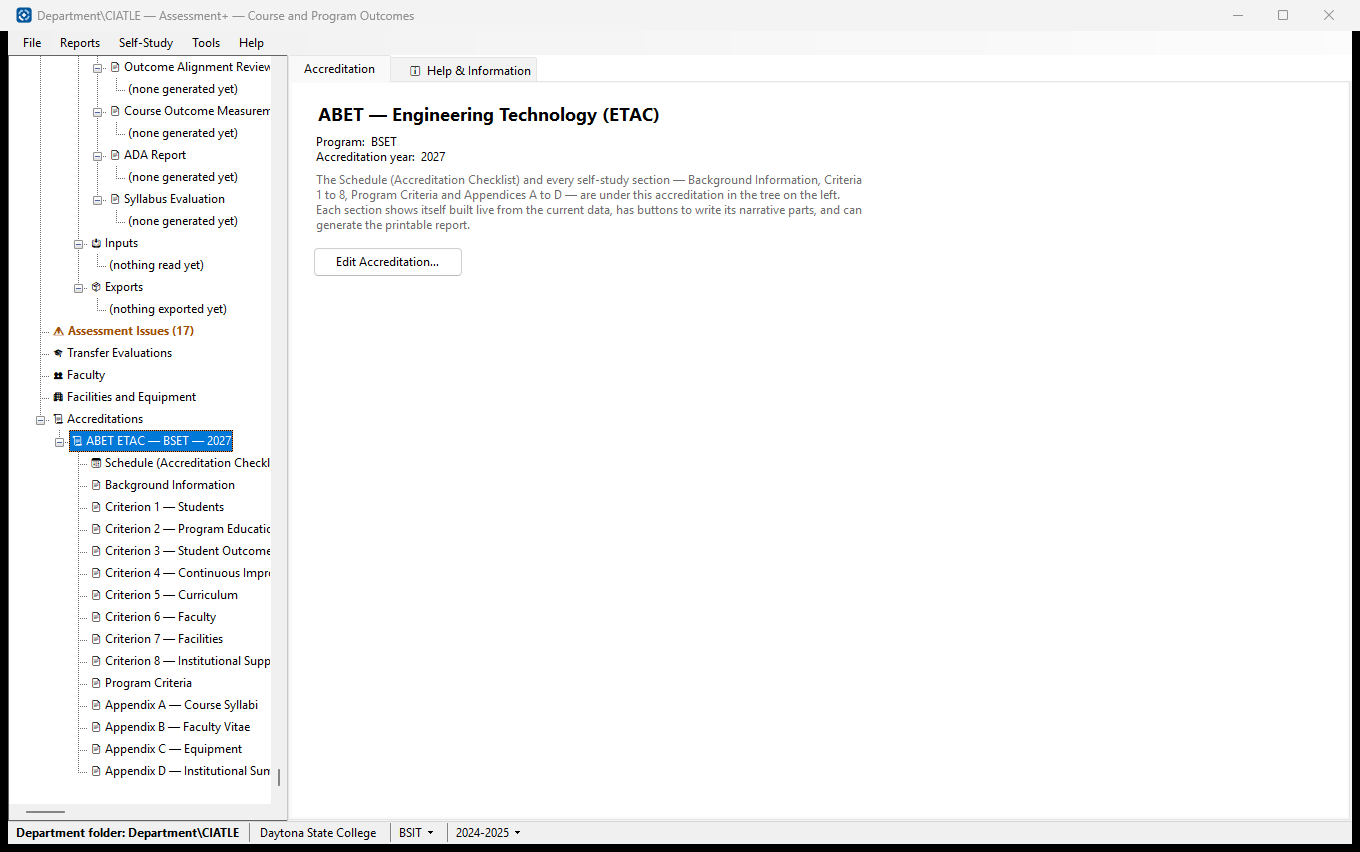
One accreditation effort: its type, program, year and notes. Its schedule and self-study sections are under it in the tree.
How to use it
- Click Edit Accreditation… to change the type, program, year or notes.
- Open Schedule (Accreditation Checklist) under it in the tree to track the steps to the visit.
- Open each section under it (Background Information, Criteria 1 to 8, Program Criteria, Appendices A to D) to see it built from the current data and write its narratives.
What it means, and what to watch for
- Selecting any part of this accreditation makes its program the active program in the status bar at the bottom of the window.
- Criterion 4 reports one assessment cycle: the academic year chosen in the drop-down in the status bar.
See also
- Accreditations — all accreditation records; Remove is there.
Adding or editing an accreditation
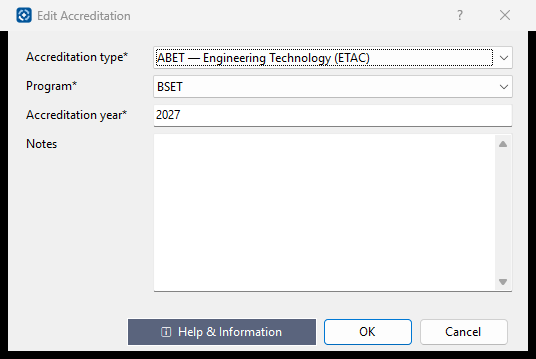
Which accreditation, for which program, in which year.
How to use it
- Choose the accreditation type.
- Choose the program (create it under Programs first if it is not listed).
- Type the year, e.g. 2026 or 2026-27, and any notes, then OK.
What it means, and what to watch for
- The type decides the default checklist the Schedule starts with.
See also
- Schedule (Accreditation Checklist) under the accreditation in the tree.
Schedule (Accreditation Checklist)
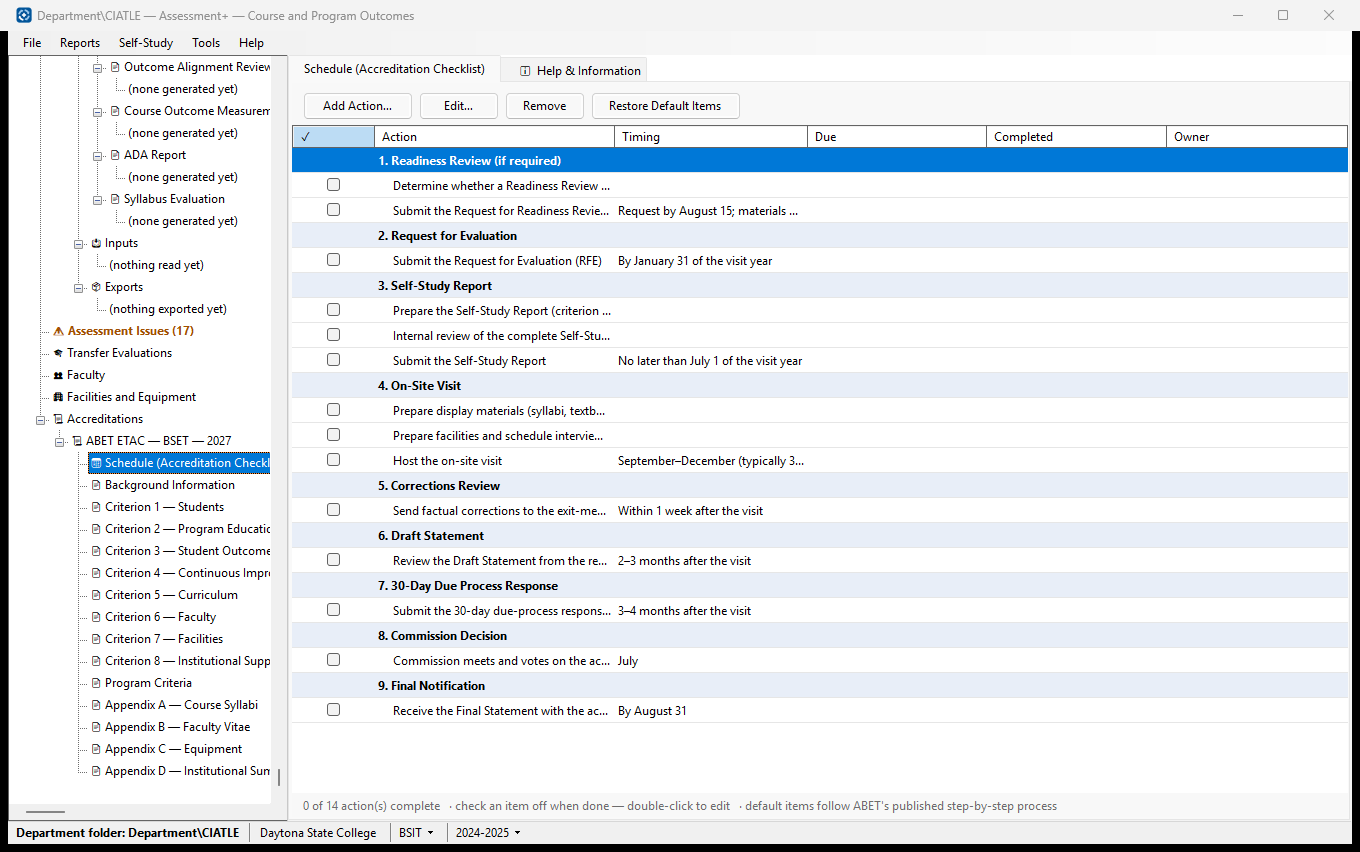
Every step of the accreditation, from the Request for Evaluation to the final decision, grouped by category, with due dates, owners and a tick when done.
How to use it
- Tick ✓ when an action is done — today's date is recorded as Completed.
- Double-click an action (or select it and click Edit…) to set its due date, owner, timing and notes.
- Click Add Action… to add your own; it goes in the category of the row selected.
- Click Restore Default Items to bring back default steps that were removed.
What it means, and what to watch for
- The default actions follow ABET's published step-by-step process and are added the first time this screen opens.
- Red text — past its due date and not done. Grey text — done.
- Timing — when the step normally happens, in words; Due — your own date.
- Edit… and Remove work on an action, not on a category heading (the shaded rows).
- Restore Default Items keeps your ticks, dates and your own actions.
See also
- The self-study sections under this accreditation in the tree.
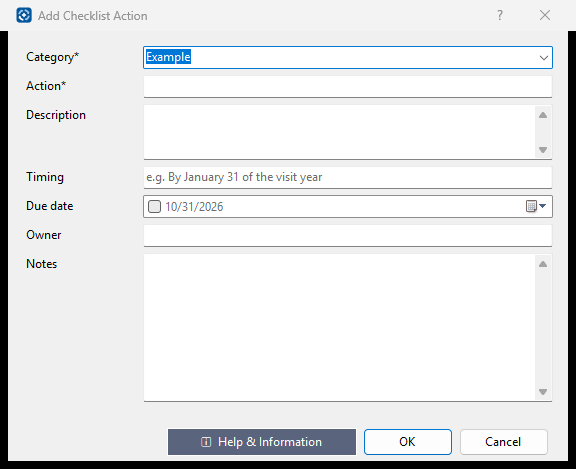
Checklist Action
One step on the way to the accreditation visit.
How to use it
- Choose a category, or type a new one.
- Type the action (required) and, if useful, a description.
- Tick Due date to set one; add the owner, timing and notes; OK.
What it means, and what to watch for
- Timing — when the step normally happens, in words (e.g. "By January 31 of the visit year"). Due date — your own deadline.
- Tick the action off on the Schedule screen when it is done.
See also
- Schedule (Accreditation Checklist).