
Each section below is the help that screen shows in Assessment+ itself, on its ℹ Help & Information tab (or F1), so it matches what you see on screen.
Reports
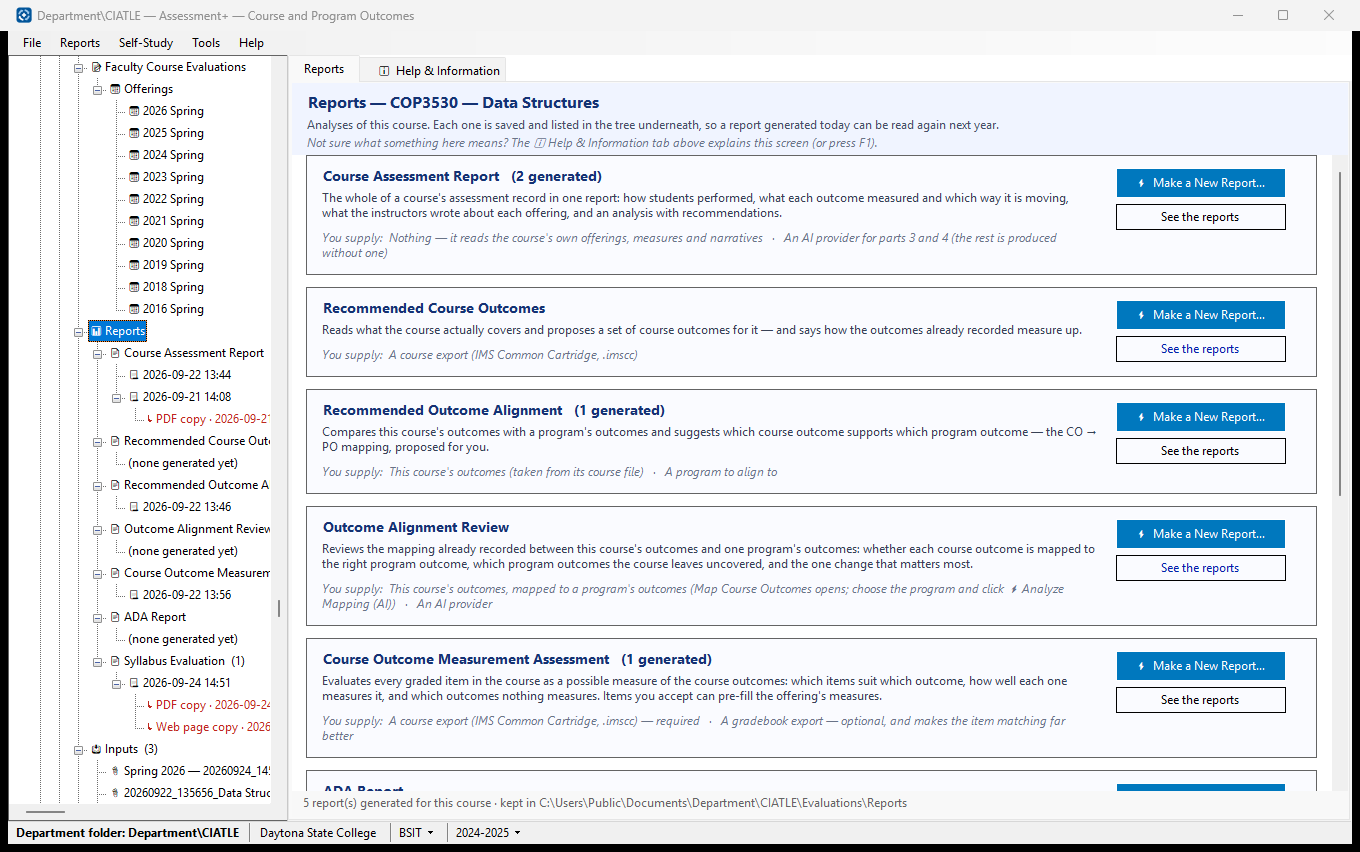
The analyses Assessment+ can run on one course. Each produces a report that is kept, so it can be read again, compared with a later one, or shown to a reviewer.
How to use it
- Pick the report you want below — each card says what it tells you and what it needs from you.
- Click ⚡ Make a New Report…. If one already exists you are offered it first, and the See the reports button lists them all. A new report opens when it finishes and is saved automatically.
- Afterwards it appears in the tree under this course, dated. Click it to read it again.
What it means, and what to watch for
- A course outcome (CO) is what a student should be able to do at the end of this course. A program outcome (PO, sometimes SLO) is what a graduate of the whole degree should be able to do. Mapping says which program outcome each course outcome supports.
- A "course export" is your course packaged as one file, in IMS Common Cartridge format (.imscc). In Brightspace: Course Admin ▸ Import / Export / Copy Components ▸ Export as Common Cartridge, selecting all components. In Canvas: Settings ▸ Export Course Content. The export is what tells Assessment+ which graded items the course has.
- A "gradebook export" is the spreadsheet of your grade book (Brightspace and Canvas both offer Export). It is optional: it lets Assessment+ match a graded item in the export to the column you actually grade it in.
- The ADA Report runs entirely on this computer and needs no AI provider. The Course Assessment Report needs one only for its last two parts. The others are written by an AI provider (Tools ▸ AI Settings); you are told if none is configured, before anything is asked of you.
- The ADA Report and the Syllabus Evaluation are about the course's materials, so they can be run before the course has a course evaluation file. The others need its outcomes.
- The Syllabus Evaluation checks against the department's list of required items, kept under Tools ▸ Syllabus Requirements.
- Recommended Outcome Alignment proposes a mapping to a program from nothing; the Outcome Alignment Review judges the mapping already recorded (it is asked for in Map Course Outcomes, with ⚡ Analyze Mapping (AI)). Each lists only its own reports.
- A report is a suggestion, not a decision. Nothing it proposes changes the course until you accept it — the Measurement Assessment, for example, offers its items for the offering's measures and you choose which to take.
- Reports are kept in the department folder, under Evaluations, so they survive between sessions and can be opened outside Assessment+.
See also
- Faculty Course Evaluations (under this course) — where a semester's measures are recorded.
- Tools ▸ AI Settings — the provider these reports use.
- Tools ▸ Syllabus Requirements — what every syllabus in the department must contain.
Already Made
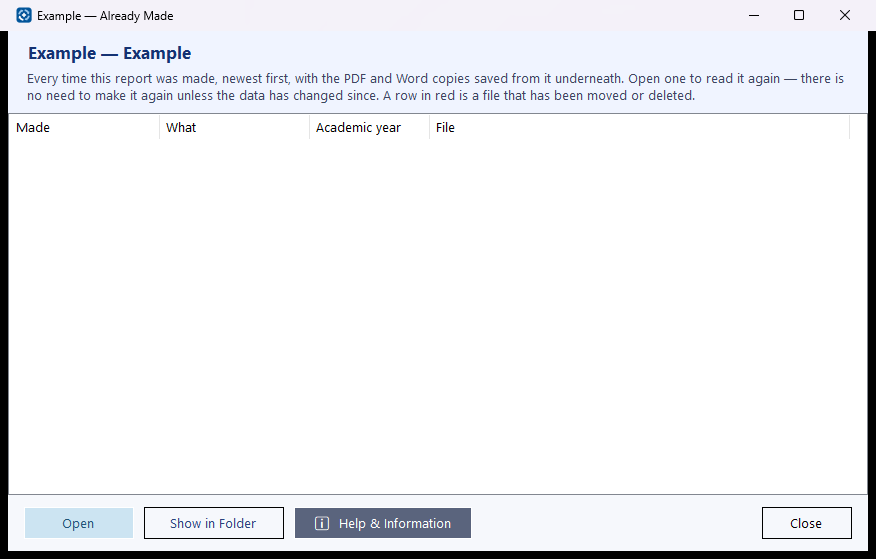
Everything already made for this report: each time it was generated, and every PDF or Word copy saved from it, so you can open it instead of making it again.
How to use it
- Select a row; the newest is at the top.
- Click Open (or double-click) to read it.
- Click Show in Folder to find the file in File Explorer.
What it means, and what to watch for
- Indented rows marked ↳ are copies saved from the report above them.
- A row in red is a file that has been moved or deleted.
- Make the report again only if the data has changed since.
- Close returns you to where you were; nothing here is changed or deleted.
Report
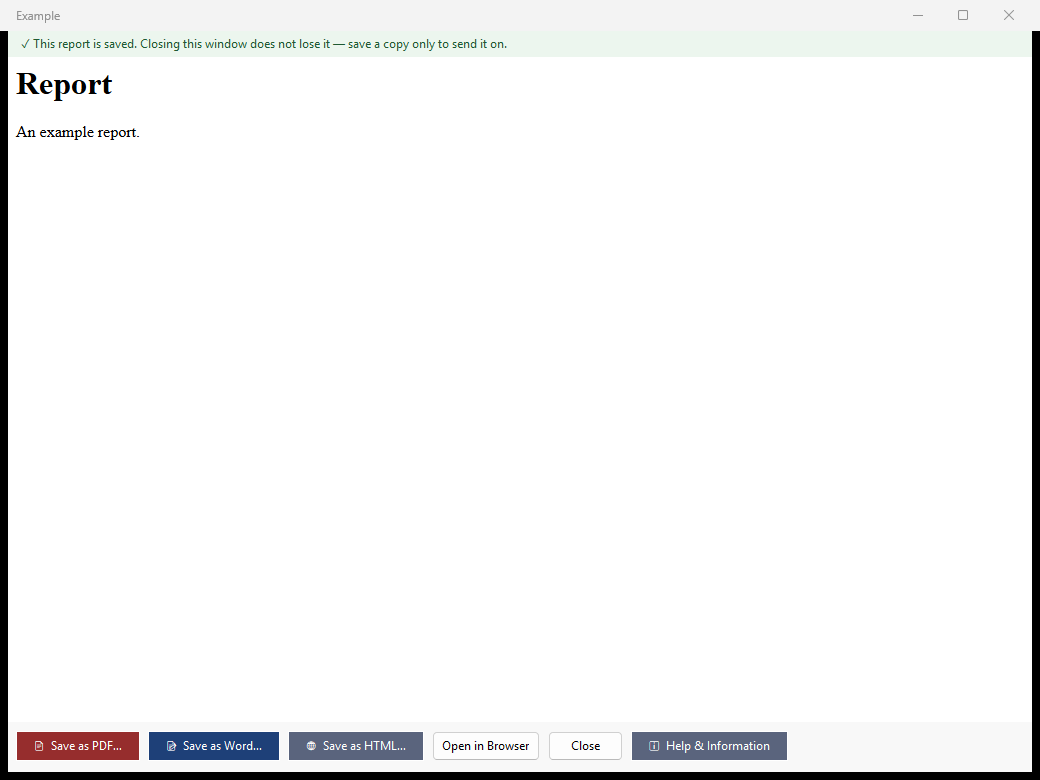
Shows a finished report.
How to use it
- Read the report. Links in it open in your web browser.
- 📄 Save as PDF… — the format to send or file.
- 📝 Save as Word… — a copy you can edit in Word before sending.
- 🌐 Save as HTML… — the report as a web page. Open in Browser opens it in your browser.
What it means, and what to watch for
- A course report is kept under Courses ▸ the course ▸ 📊 Reports; a program report is kept on its card in the program's 📊 Reports; a self-study section is kept on its section's screen under Accreditations (Made Before…), or — for a program with no accreditation — offered again from the Self-Study menu.
- Every copy you save of a kept report is listed under that report, wherever you saved it — and, for a course report, under the course's 📦 Exports too.
- Save as PDF needs the Microsoft Edge WebView2 component, part of Windows 11 and recent Windows 10. Without it the button is greyed out and a note says why; use Word or HTML.
- The Word copy is a .doc file Word opens directly; in Word, File ▸ Save As ▸ Word Document makes a .docx.
See also
- Courses ▸ the course ▸ 📦 Exports — every file saved from this course.
Report
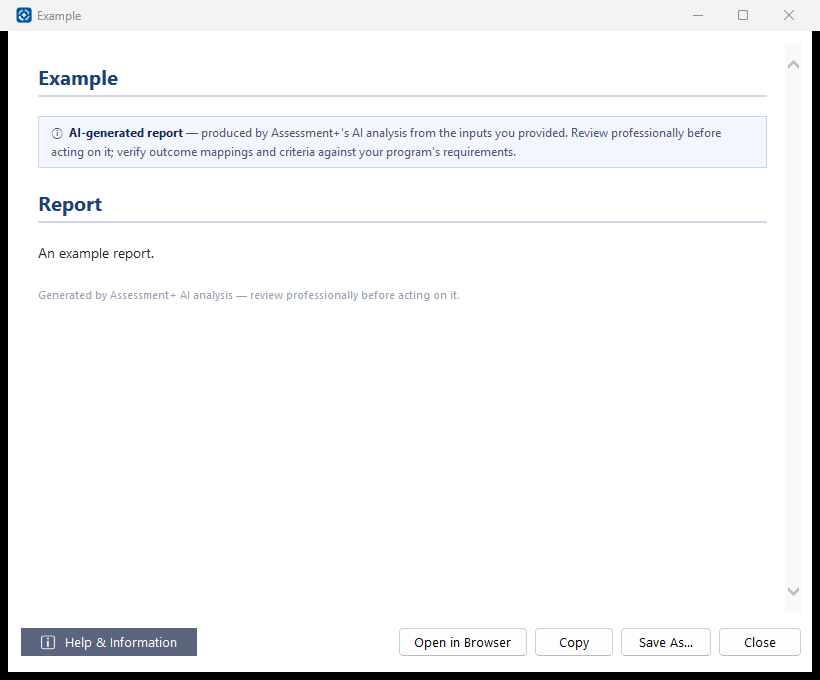
Shows a report Assessment+ generated. A report written by an AI provider carries a banner saying so: read it as a draft to check, not as a finding.
How to use it
- Read the report.
- Copy puts the formatted report on the clipboard, to paste into Word or an email.
- Save As… saves it as a web page (.html). Open in Browser opens it in your web browser, where it can be printed or saved as PDF.
- Close returns to the screen you came from.
What it means, and what to watch for
- Reports made from a course's 📊 Reports (and the Course Outcome Measurement Assessment) are kept there already. Some quick analyses — such as the mapping analysis from Map Outcomes — are only shown: use Save As… to keep a copy.
- The colours in the report: green is a positive judgement, amber a caution, red a problem.
See also
- Courses ▸ a course ▸ 📊 Reports — reports kept for each course.
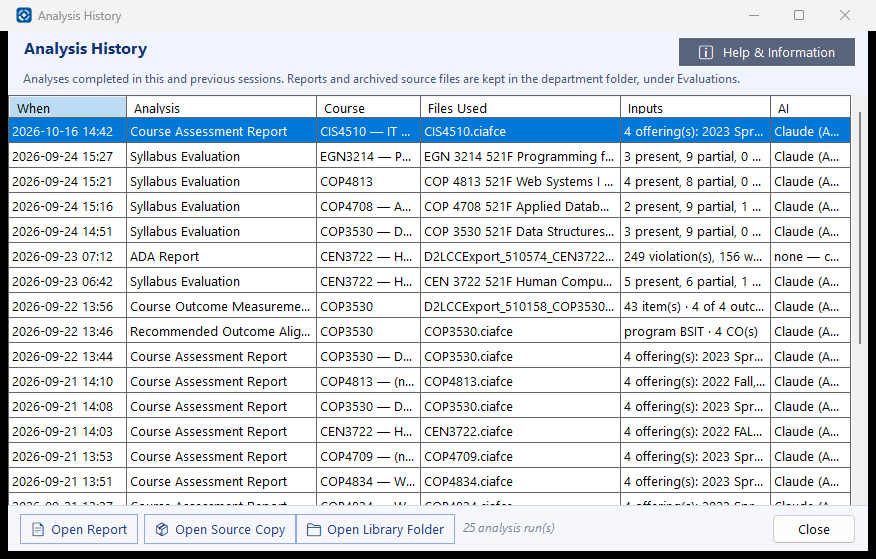
Analysis History
Every analysis run on this computer, newest first, with its report and a kept copy of the file it read.
How to use it
- Select a row.
- Click 📄 Open Report (or double-click the row) to read the report again.
- Click 📦 Open Source Copy to show the kept copy of the file the analysis read.
- Click 📁 Open Library Folder to see every kept report and file.
What it means, and what to watch for
- Files Used — the course export and course file the analysis read. Inputs — the options chosen. AI — the provider used.
- A greyed button means that file is no longer on this computer.
- Reports and copies are kept in the department folder, under Evaluations.
See also
- Courses ▸ a course ▸ 📊 Reports — where course reports are made and listed.
Rename Reports
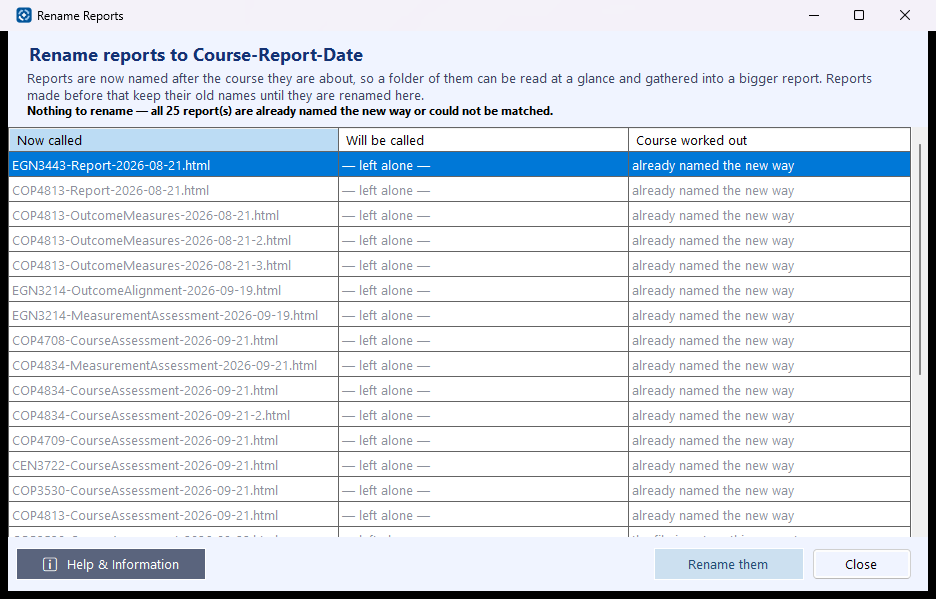
Gives reports made before the naming rule their new names — course, report, date — so a folder of them reads at a glance. Nothing changes until you click Rename them.
How to use it
- Read the list: each report file, what it will be called, and how its course was worked out.
- Rows marked "— left alone —" are not renamed; the last column says why.
- Click Rename them, and confirm. Or Close to change nothing.
What it means, and what to watch for
- Now called / Will be called — the file name before and after.
- Course worked out — how Assessment+ decided which course the report is about.
- Only the file names change; what is inside the reports does not. The list that finds them is updated too, and a copy of that list is kept first.
- Anything you already sent to somebody, or linked to from elsewhere, keeps the old name.
See also
- Courses ▸ a course ▸ 📊 Reports — where the reports are listed.