
Each section below is the help that screen shows in Assessment+ itself, on its ℹ Help & Information tab (or F1), so it matches what you see on screen.
Institution
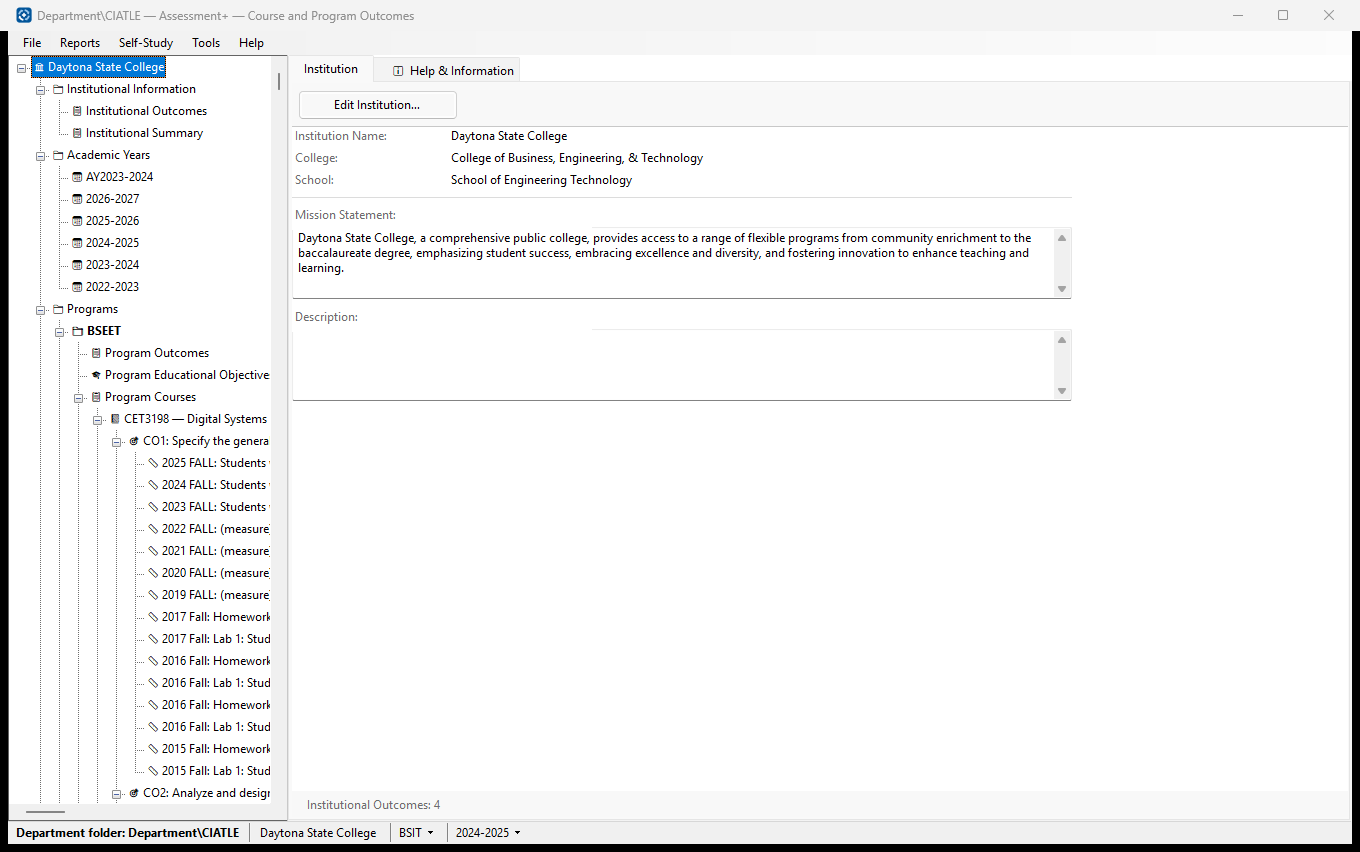
Your institution's name, college, school, mission statement and description. The name heads the tree on the left and appears on the program-level reports.
How to use it
- Check the details shown.
- Click Edit Institution… to change them, then OK to save.
- Open Institutional Outcomes (under Institutional Information) to list the institution's learning outcomes.
What it means, and what to watch for
- Institution Name is required. Everything else is optional.
- College and School — as your institution names them; they are shown with the institution.
- The line at the bottom counts the institutional outcomes (ILOs) defined.
- One institution per department folder: every program in the folder shares these details.
- The institution at the top of the tree and Institutional Information open this same screen.
See also
- Institutional Information ▸ Institutional Outcomes — the ILOs that program outcomes map to.
- Institutional Information ▸ Institutional Summary — the Appendix D facts for a self-study.
Edit Institution
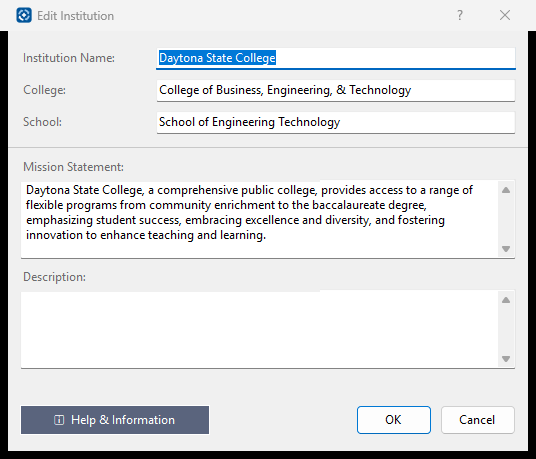
Your institution's name and details, used on the program-level reports.
How to use it
- Type the institution's name (required).
- Add the college, school, mission statement and description if you have them.
- Click OK.
What it means, and what to watch for
- Nothing is saved if you click Cancel.
- These details are shared by every program in this department folder.
See also
- Institutional Information ▸ Institutional Outcomes.
First-Time Setup
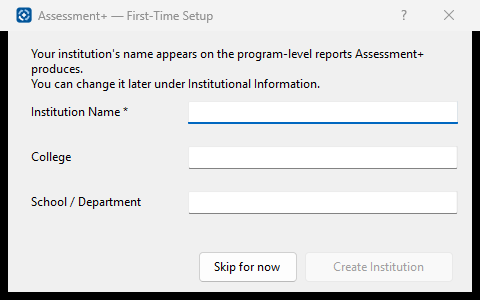
Names your institution, which heads the tree and appears on the program-level reports.
How to use it
- Type the institution's name (required).
- Add the college and the school or department if you like — both are optional.
- Click Create Institution, or Skip for now to do it later.
What it means, and what to watch for
- Skip for now asks again the next time you open a program-level screen in a later session.
- Everything here can be changed later: select the institution at the top of the tree and click Edit Institution….
See also
- Institutional Information ▸ Institutional Outcomes.
Institutional Outcomes
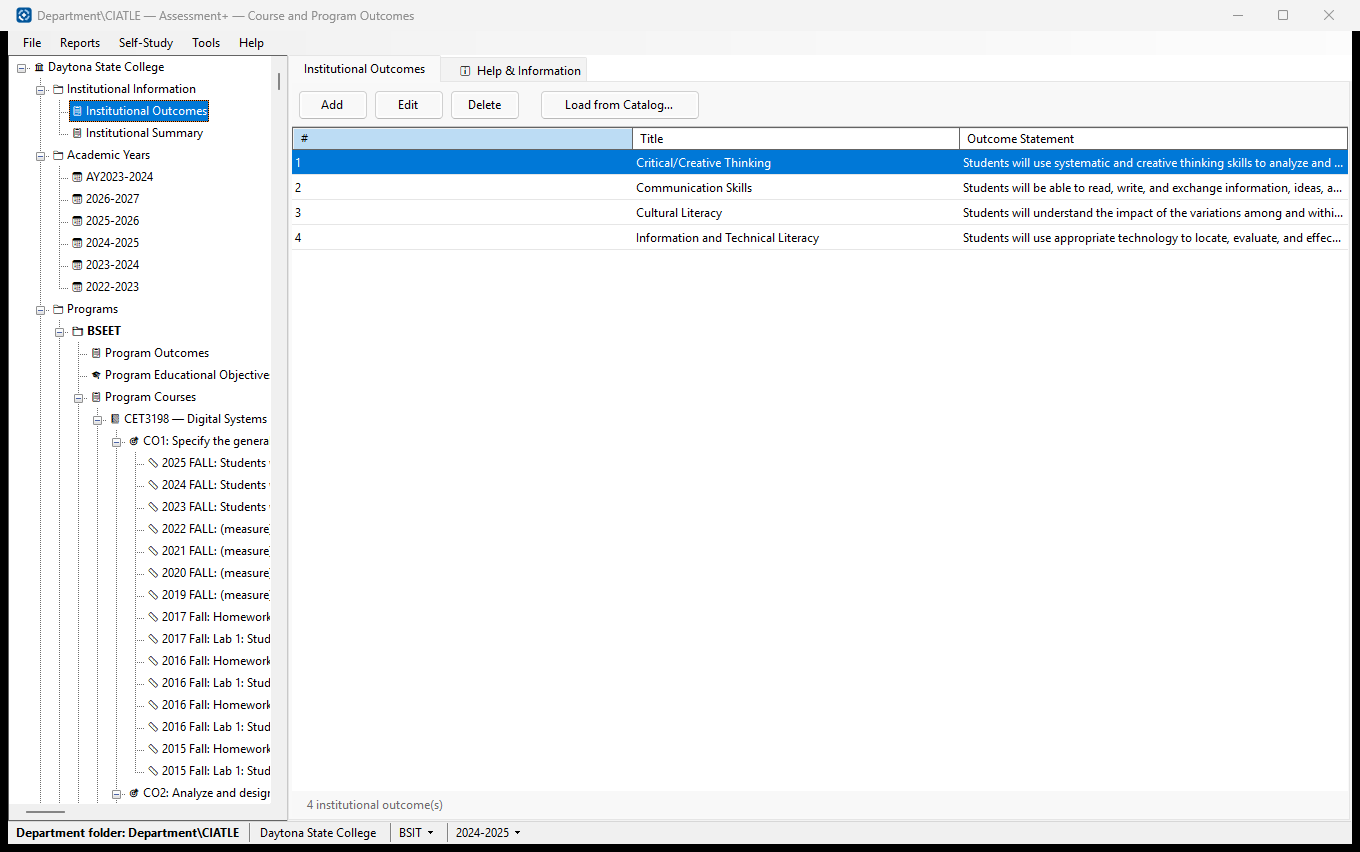
The institution's learning outcomes (ILOs) — what every graduate of the institution should be able to do. Each program's outcomes are mapped to them.
How to use it
- Click Add to type an outcome: its number, a short title and the full statement.
- Or click Load from Catalog… to start from a ready-made set.
- Select a row and click Edit (or double-click it) to change it.
- Select a row and click Delete to remove it.
- Map each program's outcomes to these under Programs ▸ the program ▸ Program Outcomes ▸ ✏ Edit.
What it means, and what to watch for
- ILO — institutional learning outcome. # is its number; program outcomes refer to it by that number.
- Title — a short name, e.g. "Communication"; the Outcome Statement is the full wording.
- Load from Catalog… replaces the outcomes listed here. Assessment+ asks first and saves the current list as a catalog, so you can put it back from Tools ▸ Outcome Catalogs.
- Deleting an ILO does not change the program outcomes mapped to it — they keep its number. Assessment+ names them before you delete; check their mappings afterwards.
- The line at the bottom counts the outcomes. The FCE Summary Spreadsheet puts the ILO titles in its first column.
See also
- Tools ▸ Outcome Catalogs — ready-made outcome sets, including backups of lists you replaced.
- Programs ▸ a program ▸ Program Outcomes — map program outcomes to these ILOs.
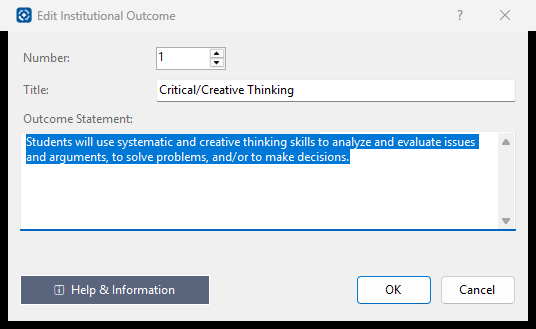
Institutional Outcome
One of the institution's learning outcomes (ILO).
How to use it
- Set its number.
- Type a short title, e.g. "Communication" (optional).
- Type the full outcome statement (required), then OK.
What it means, and what to watch for
- Program outcomes refer to an ILO by its number, so changing the number changes which ILO they point at.
See also
- Programs ▸ a program ▸ Program Outcomes — map POs to ILOs.
Institutional Summary
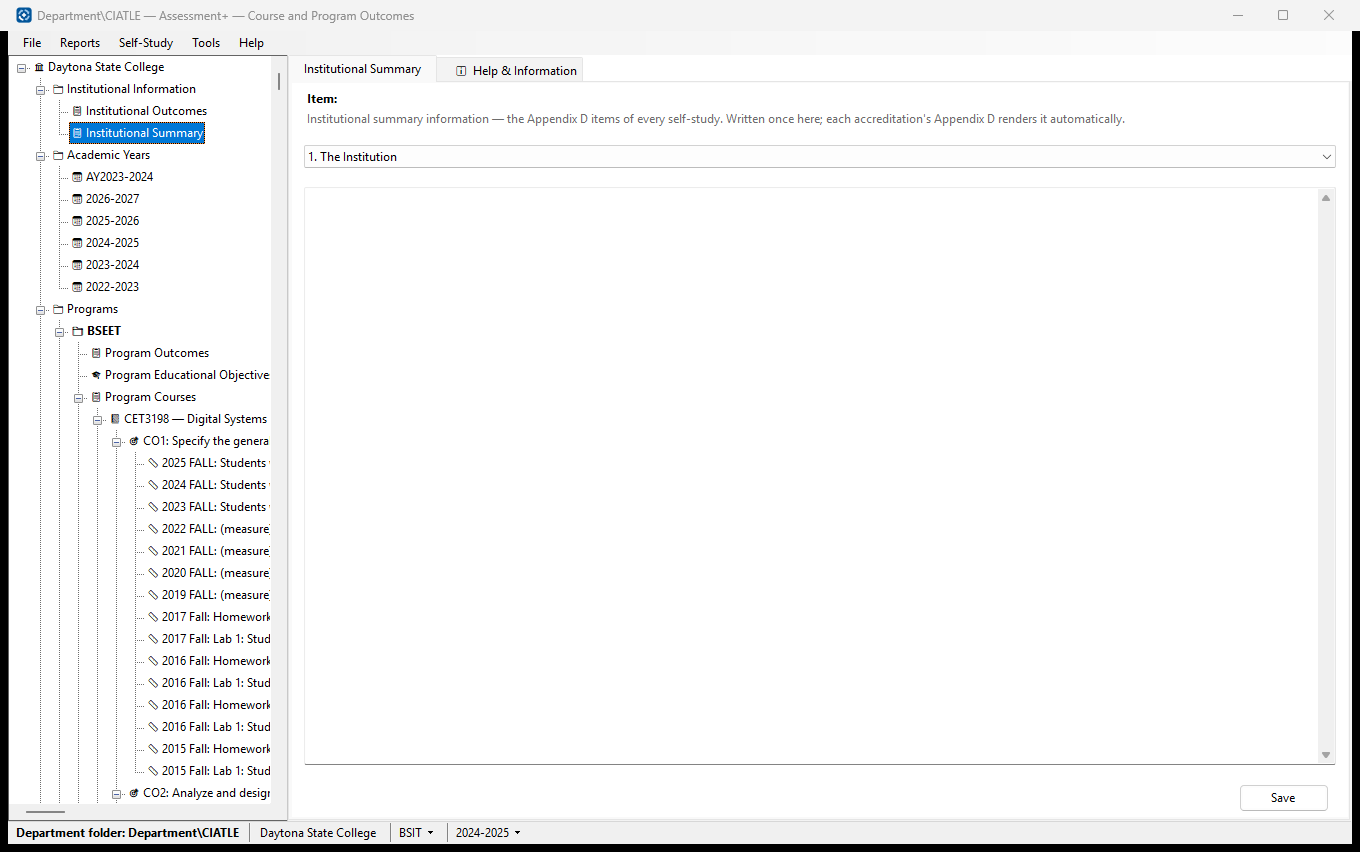
The institution-level facts every ABET self-study asks for in Appendix D — the chief executive, type of control, educational unit, support units, credit policy and similar. Write them once here and every accreditation's Appendix D uses them.
How to use it
- Choose an item in the Item list.
- Type or paste its text in the box below.
- Click Save. The line beside the button says when it was saved.
- Repeat for each item.
What it means, and what to watch for
- Save saves the item shown. If you choose another item with unsaved text, Assessment+ asks whether to save it first (Cancel keeps you on the item).
- Leaving this screen with unsaved text saves it.
- Saving an empty box removes that item's text.
- The text is kept with the institution, so it is the same in every accreditation in this department folder.
- The institution must be named before anything can be saved: select the institution at the top of the tree and click Edit Institution….
See also
- Accreditations ▸ an accreditation ▸ Appendix D — Institutional Summary — the section built from this text.