
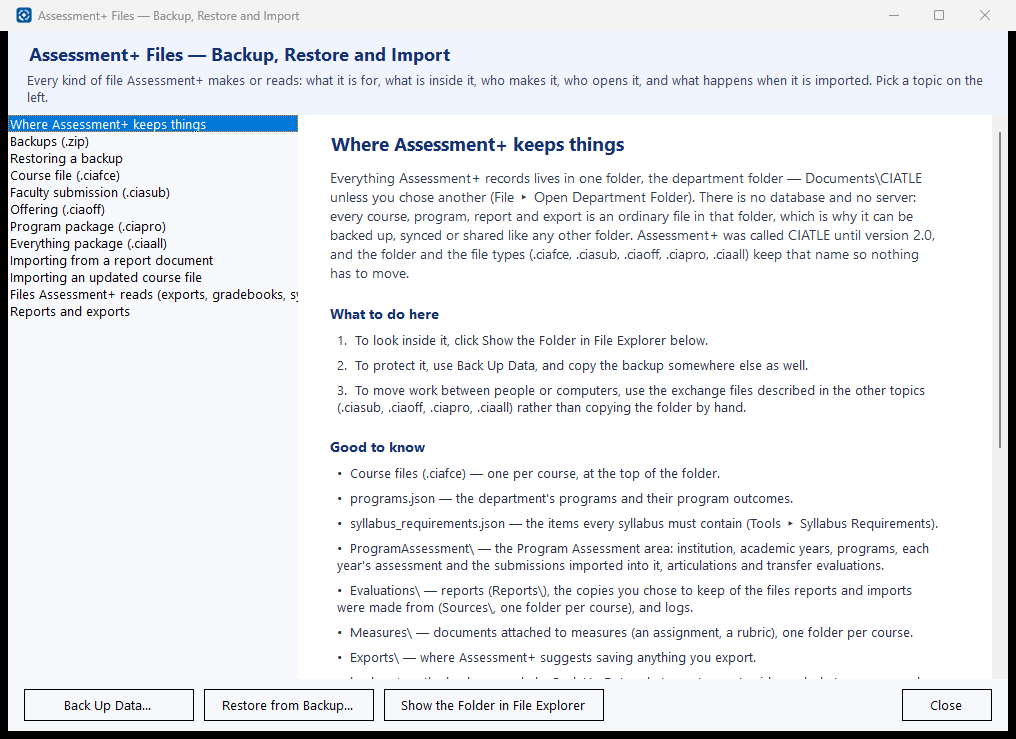
Each section below is the help that screen shows in Assessment+ itself, on its ℹ Help & Information tab (or F1), so it matches what you see on screen.
Submissions and Imports
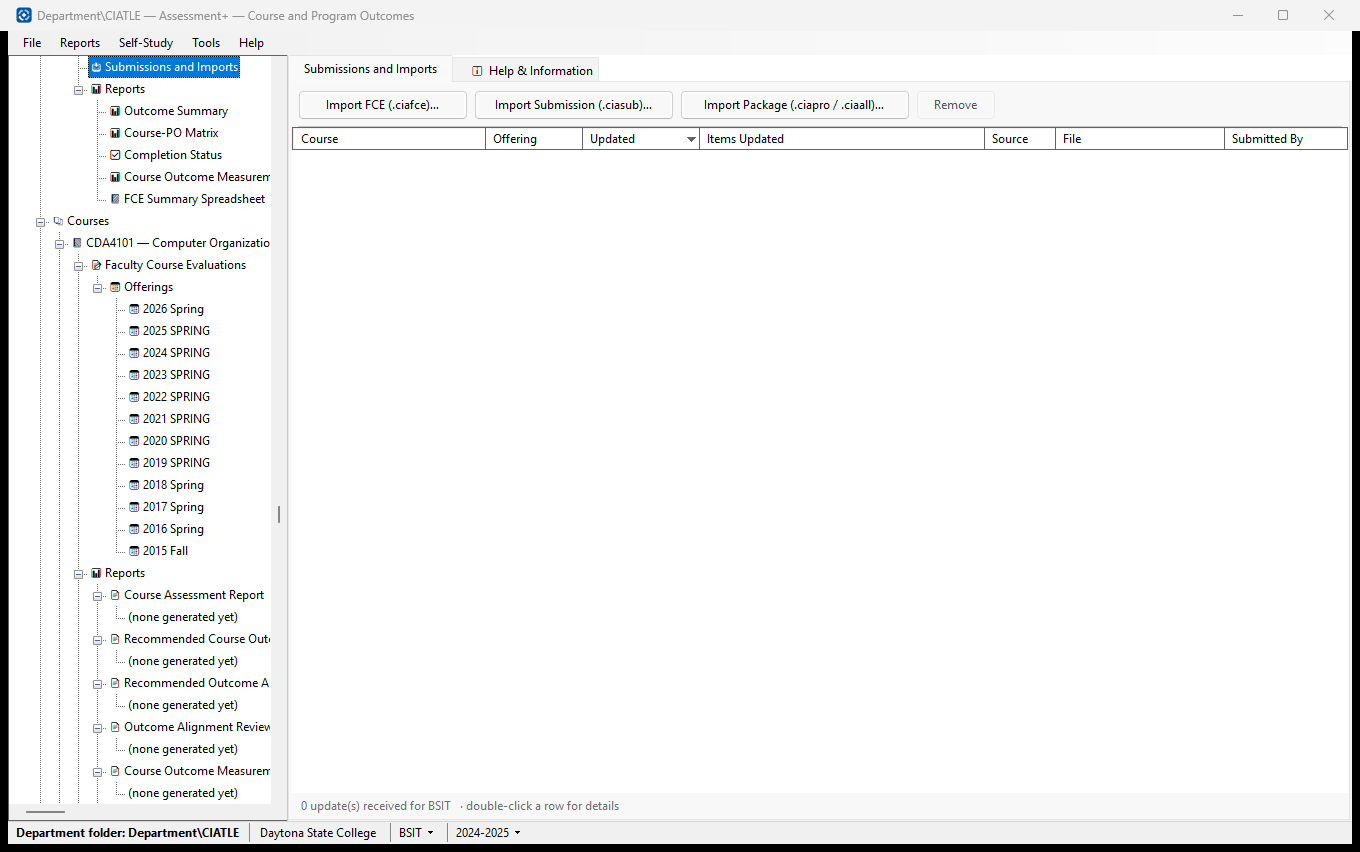
Every file received for this program from faculty or another computer, one row per course and offering updated, newest first. Import new files here.
How to use it
- Choose the program (and, for a .ciasub, the academic year) in the drop-downs in the status bar at the bottom of the window.
- Click the button for the kind of file you received: Import FCE (.ciafce)…, Import Submission (.ciasub)… or Import Package (.ciapro / .ciaall)….
- Check the preview and confirm.
- Double-click a row to see what it changed.
What it means, and what to watch for
- .ciasub — a faculty member's submission of a course's evaluations; imported into the academic year chosen in the status bar. It cannot be imported into a year that has been finalized.
- .ciafce — a course file; .ciaoff — one offering (File ▸ Import ▸ Import FCE Offering); .ciapro / .ciaall — a whole program, or everything, from another computer.
- Remove (for a .ciasub row) takes that submission and its measures out of its academic year. The archived copy of the file is kept; the removal cannot be undone.
- Source — the kind of file. Submitted By — who sent it, when the file says.
See also
- Reports ▸ Completion Status — what is still missing.
- File ▸ Assessment+ Files — Backup, Restore and Import — what each file type holds.
Import FCE Submission
A preview of what a faculty member's .ciasub will add to the academic year chosen in the status bar, before anything changes.
How to use it
- Check the course and who submitted it.
- Check Matching offerings: only offerings in the year's terms are imported; the rest are skipped.
- Read the mapping list and any warnings or errors.
- Click Import, or Cancel to change nothing.
What it means, and what to watch for
- ⚠ Not mapped — the course outcome has no program outcome for this program; its measures will not count until the course's mapping is fixed and the submission sent again.
- Errors stop the import; warnings do not.
See also
- Submissions and Imports.
- Academic Years — the terms that decide matching offerings.
Submission Detail
What one imported .ciasub brought in: who sent it, how each course outcome maps to a program outcome, and every measure it added.
How to use it
- Read the Submission block for who sent it and when.
- Check the mapping list: every course outcome should point at a program outcome (PO).
What it means, and what to watch for
- (unmapped) — the course outcome has no program outcome for this program, so its measures do not count.
- [override] — the mapping was changed by the coordinator; [inactive] — the course outcome is retired.
- N — students measured; Met — students meeting the measure's passing score.
See also
- Submissions and Imports — Remove takes this submission out.
Import Package — Review
What a .ciapro (one program) or .ciaall (everything) package would add or change on this computer. Nothing changes until you click Import.
How to use it
- New items are ticked: they only add data.
- Changed items differ from what is here and are not ticked. Tick one only if the incoming version should replace yours.
- Click Import, or Cancel to change nothing.
What it means, and what to watch for
- Unchanged items are skipped.
- Back up first (File ▸ Back Up Data) if you are replacing much.
See also
- File ▸ Export Program / Export Everything — how packages are made.
Import All from Report
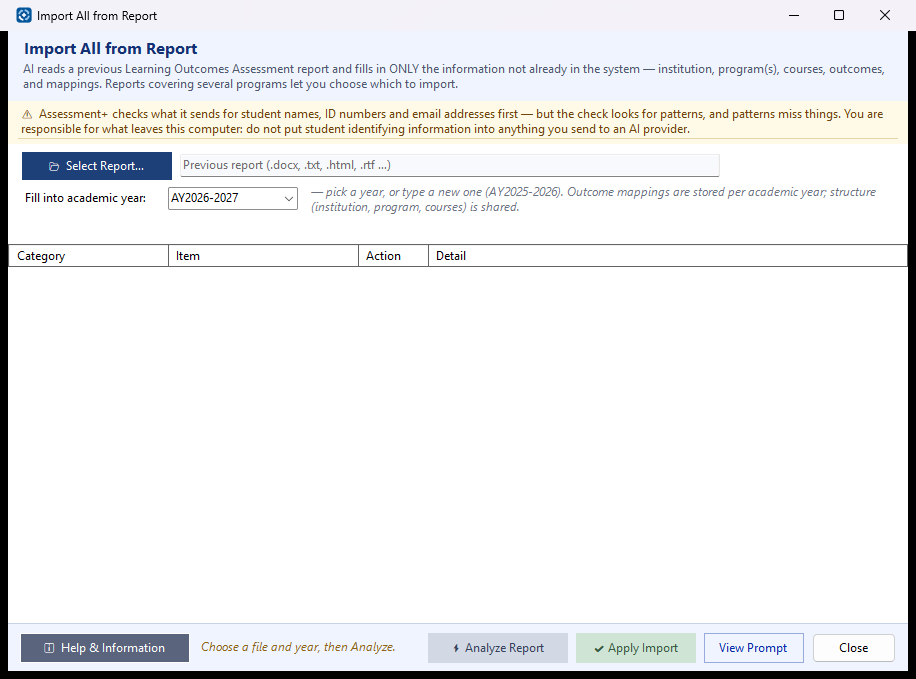
Reads a Learning Outcomes Assessment report you already have and fills in what Assessment+ does not have yet: institution details, programs, courses, outcomes and mappings. Nothing already recorded is overwritten, and nothing is written until you click ✔ Apply Import.
How to use it
- Click 📂 Select Report… and choose the report (.docx, .txt, .md, .html or .rtf).
- In Fill into academic year, pick the academic year the report's mappings belong to, or type a new one (for example AY2025-2026). A year typed as 2025-2026 is read as AY2025-2026.
- Import Courses only: choose the existing program to import courses into.
- Click ⚡ Analyze Report. Your AI provider reads the report; this can take a minute or more.
- Check the preview. If the report covers several programs, tick the ones to import.
- Click ✔ Apply Import and confirm.
What it means, and what to watch for
- Import All — institution, programs and their data. Import Program — the chosen programs only; institution details are not changed. Import Courses — only the courses missing from one existing program, with their mappings; a small extraction that can finish a large report the other modes could not.
- Action: Add (green) — new to Assessment+. Fill (blue) — fills a blank. Grey — already present, left alone.
- Programs, courses and outcomes are shared across years; course-to-program mappings are kept per academic year. A year that does not exist yet is created when you apply.
- Extraction Incomplete — the report was too long for one answer. Apply what was recovered, then Analyze again; items already imported are skipped.
- What is sent: the report's text, checked for student identifying information first — you are shown anything found before it is sent.
- View Prompt shows the exact request; nothing is sent from there.
See also
- Program Courses — attach each course's course file to pull in its data.
- Tools ▸ AI Settings — the provider that reads the report.
Importing from a report document
File ▸ Import ▸ Import All / Program / Courses from Report reads last year's Learning Outcomes Assessment report (a Word, PDF, web or text document) and fills in the institution, programs, courses and outcomes from it, so they need not be typed.
How to use it
- Choose which: All (institution, programs, year data), Program (only the programs you pick) or Courses (courses missing from one program).
- Pick the document, and name the academic year it describes.
- Review the preview. Nothing is written until you accept it.
What it means, and what to watch for
- It uses your AI provider to read the document. The text is checked for student identifying information before it is sent, and anything found is shown to you to remove.
- It only fills blanks: nothing already in Assessment+ is overwritten.
- A PDF can be read too: choose All Files in the file dialog.
See also
- Tools ▸ AI Settings
Importing an updated course file
File ▸ Import ▸ Import Updated FCE (.ciafce) is for a coordinator who receives a newer copy of a course file: it replaces the program's copy with the new one.
How to use it
- Choose the program, then the file. The course is matched by its course code.
- If the course has no file yet, the new one is copied into the department folder and attached.
- If it has one, Assessment+ lists what differs and asks before replacing it.
What it means, and what to watch for
- This REPLACES the whole file — it does not merge. The previous version is kept beside it, with the date and time and .bak added to its name, so every earlier version is kept.
- To add one semester without replacing anything, use an offering file (.ciaoff) instead.
- The course must already be in the program (add it under Programs ▸ the program ▸ 📋 Program Courses ▸ + Add first).
See also
- Offering (.ciaoff)
- Course file (.ciafce)